Tuesday, December 18, 2007

Getting up to Speed!

Good God! No post since September!

What can I say, both Keith and myself are busy with family life. Since the last post we've had a few campaign games played. Sweden, Prussia and the Allied States have joined forces and over-run Austria. France is on the defencive and my beautiful Russia is under siege on all fronts. I've pictures from 3 battles to post ... sorry they haven't been put up yet.

Merry Christmas !! Keep your powder dry and your gaiters clean!

Sunday, September 30, 2007

A New Campaign

Well, we've managed to get a Seven Years War campaign going!

Our thanks to Steve, who is running the "Grand Strategy" part of the campaign from the States while we fight all the battles here in Canada at our weekly gaming sessions. We are using a map similar to the Sport of Kings map.

I get to play the Anglo-German forces, who have managed to enlist the help of the Dutch to drive the French out of the Low Countries. Anglo-German forces have laid siege to key French fortresses in Berg while the French have similarly besieged my German troops in Franconia. But those actions are but a side show! Last night we played a field battle in Westphalia featuring 520AP of French against 400AP of Brits & Germans and 200AP of Dutch.


In this picture, the Anglo-Dutch are on the right, deployed in front of a small village, while the French are on the left, straddling a large swamp. The terrain was very marshy with a few gentle gnolls scattered across the field. A small lake sealed off my right flank. The French deployed with the majority of his cavalry on his far left, while we British had concentrated our cavalry on our far left. These were supported by British muskets, fusiliers and guards and the Hanoverian guard. The center was held by Hessians and Brunswickers and the Dutch held the far right.


We quickly raced up on the French right and hit their flank with our cavalry. The French responded by driving their troops forward in a series of column attacks on the British infantry, hoping to break through before their flank was crushed by the cavalry charge.

Meanwhile, the French pushed forward on their left against the Dutch, hoping to have more success there. (Note: Emen wasn't here with his Dutch figures, so I substituted my Hanoverians instead) Mark B helped immensely here, delaying the French advance with his hussars (now pulled back to safety behind his guns) and his jaegers until victory could be accomplished on the far left.

With their entire right surrounded, with horse behind them and elite British infantry to the front, it was only a matter of time before the French collapsed. Thanks to a couple of good moves and several good dice rolls, it was a longer time than it might have been and the French managed to bloody my British nose a bit before they went down. The picture above shows Sparky trying to keep his French from fleeing the field and (even more gloriously) my British horse and German cavalry swarming the routers :-)
French losses 135AP, British losses 47AP. The French have pulled back and the Brits are now masters of Westphalia (but only, as Sparky says, "for now.......")
Thanks for a great game guys.


Friday, September 21, 2007

Summers over, the kids are back in school and a new SYW campaign session has begun in our local group of musket balls!

Summer was busy with little time for pushing lead on the table. Hopefully Keith and I will have some great campaign reports soon.

Gary

Tuesday, July 10, 2007

Portuguese Cacadores

Hello everyone! There haven't been any post in a while because of "summer shutdown" and because I'm in the middle of a move.
Keep watching for new posts soon. Until then, here's a picture of some of my 15mm Napoleonic Portuguese cacadores. They are Essex miniatures


Saturday, June 2, 2007

Keith Con 2007 Results

WOW! Keith Con was bigger than ever this year, with twelve players and several visitors as well. Don Cameron from Five Arrows Figures showed up again with his wares as KeithCon's official miniatures and Osprey book dealer.


Four of the players, who were new to our rules opted out of the tournament and played some non-timed "learning games". The rest played three searing rounds filled with high octane excitement and cut-the-air-with-a-knife tension.

All eyes were on this table in the second round:

Where Martin, the two time Make Ready! champion faced Gary "Going for the Gold" Giles. Gary's ceaseless playing paid off and he wrested the championship title from Martin this year and won a copy of Mark Urban's "Rifles" as a prize.

The rest of the standings were:
Gary Giles - 23.2

Martin Rowland - 16.2

Mark Beaudon - 11.8

Dave May - 10.7

Skip Johnson - 9.8

Josh Garratt - 7

Mike Manning - 5.9

Ron Giles - 2.1

Thanks to everyone who participated. Send copies of any battle reports you want posted to either me or Gary and we can put them on the site


Monday, May 28, 2007

KeithCon is almost upon us!!

This weekend, June 2nd ... KEITHCON!!!

We've been busy painting our armies, honing our lists and developing winning strategies
to take the title from the current reigning champ, Martin Rowland.
For those of you out there in the wide world of the web who can't be here in person, no problem!
We will be bringing you the reports and pictures right here.
For those who can attend in person and want to know where to go, here's the map:

http://maps.google.ca/maps?f=q&hl=en&q=eastminster+united+church&sll=49.891235,-97.15369&sspn=103.177264,84.023438&ie=UTF8&om=1&ll=44.173463,-77.357655&spn=0.011543,0.027509&z=15&iwloc=B

See you on the tables!

Saturday, May 12, 2007

SYW Austrians vs ...... SYW Austrians!

This is what wargaming is all about! A great bunch of guys out having fun. At the back table we see Gary & Mark getting ready for their SYW Prussian vs Russian game.
At this table Dave & Josh played an interesting game. Josh is new to SYW Austrians, so we set him up to play Dave with.... his SYW Austrians. There's nothing like a civil war to test the strengths and weaknesses of an army! The table was set with lots of thick woods and both players initially deployed toward the far side of the table. Dave moved quickly to grab the central wood while Josh went in hard on Dave's left flank, anchored on a little village:

While trying to delay in the village, Dave formed his cavalry up into line on the far side of the central wood and moved forward to pin Josh's hussars, seen here moving in column toward the right.
After a prolonged and difficult struggle, Josh cleared the town, but Dave had managed to reform his cavalry line on the far side and continued to delay Josh's progress and even inflict some casualties as they were slowly ground down.
Meanwhile on the other flank, Josh's hussars slipped the net, but were then hunted down by Dave's dragoons & hussars and scattered in every direction (including into a marsh!) Horse were flying everywhere in a dizzying, glorious mess. One of Josh's hussar regiments managed to charge some of Dave's grenzers coming out of the woods in column, but they were repulsed and some of Dave's cavalry dispatched them, too.
While Josh was finally clearing the town, he also launched a frontal assault on Dave's left with six battalions. Unfortunately, the attack stalled and Dave was able to concentrate his artillery fire and wheel a brigade of his infantry onto Josh's flank, shredding them. Here we see Josh's two remaining battalions making a last stand while some grenadiers rush up to the rescue.
Unfortunately for Josh, the grenadiers were too late. Having sustained serious losses, the center reached the breakpoint. With the cavalry losses on both flanks, the army's morale tipped and they quit the field. Dave, with a shaken left flank and some losses across the rest of the line, carried the day.
Dave - 9; Josh - 1.

Friday, May 11, 2007

SYW Prussian-Russian match-up.

Thursday was yet another enjoyable gaming session with a great bunch of friends. On table one, Mark (pictured below) took his SYW Prussians against Gary's SYW Russians in a 650point open game with preset terrain. The battle took place in a mountainous area: lots of difficult hills and was quite a challenge for both armies. It seems in the picture below that Mark is trying to seal off the nearest approach with some 12 pdrs. A thin line of his infantry and some advanced gun placements and scouting hussars wait to receive the rest of the Russians on the far side of the table.
But wait! Where is Seidlitz and all his cavalry? It seems they were marching around the Russians left flank. They appeared relatively early in the game. Bet Gary was glad he had his cavalry's extreme left anchored on that steep, rocky hill! That oughta slow 'em down....

While the cavalry came to grips on the left, Gary pushed his infantry forward in the center in deep columns supported by 6 pdr batteries.
The cavalry battle turned into the sprawling charging-countercharging mess that cavalry battles always turn into.
until the Russians finally triumphed and routed the Prussian cavalry then chased them off the table. But not before a Prussian cuirassier regiment charged victoriously deep into Russian lines and rode down a Russian general! Mark gets the "Bloodthirtsy General Sacker's Award" tonight.
Beaten on their right, the Prussians began to get a bit nervous as the massive phalanx of Russian infantry bore down on them in the center, but the Prussians managed to get the better of their Russian opponents and soon the Russian morale flagged, the attacked faltered and some units began breaking for cover.
Gary also pushed his Russians through the gap in the hills on the Prussian left and sent a couple of battalions around the flank of the guns Mark had left there. The Prussians on this wing began to shake. At this point, time was called with Gary's muskets about to charge into the flank of Prussia's remaining 12pdr battery which would likely have tipped Prussian morale over the edge and given Gary a complete victory. Have to make your moves faster next time, Gilesovsky!
Final Result Russians 4; Prussians 1
An exhilirating game to watch.
The battle report from table two to follow.....

Monday, May 7, 2007

War of Austrian Succession Battle Report

Thursday's game was a War of Austrian Succession match-up between the Allies (Me & Josh) and the French (Gary). It was a pick-up game, so no particular battle was being recreated. Below we see the initial set up. On the bottom/left are the French deployed with almost all their mounted on their far right. Opposite them are the Allies. The center is held by a "thin red line" of British troops. On their right (picture's left) - with troops in ambush in the town - are the Dutch and on their left are the Hanoverians, moving into position in columns.

The French moved hard on the Allies' left, sprinted across the table and fanned their horse out to attack the Hanoverians who turned to face them as shown below. You can also see a brigade of Swiss troops (in our rules each stand is a battalion) coming up to support the French attack in the center.
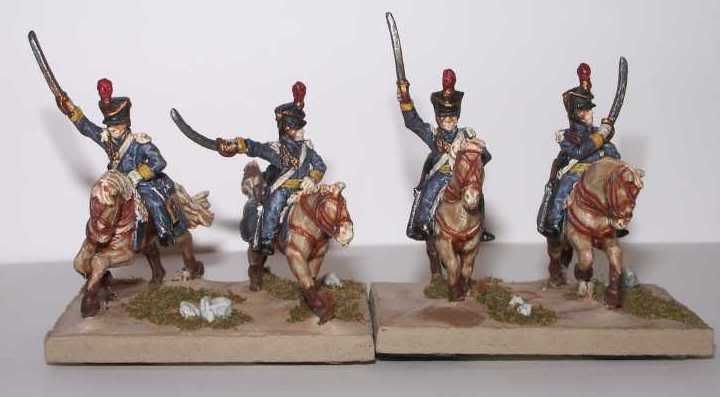
Here's a close up from behind some of the French horse and dragoons. (I really need to get some flags on those poles...). The French figures are Old Glory and the Hanoverians are Essex.

While the French were pushing on that side of the table, a Dutch (played by Josh) assault column stormed forward supported by some grenadier battalions coming out of ambush from the town and fell upon "Les Volontaires" on the French left flank:
It now became a question of which flank would crumble first. The Dutch on the Allied right had some initial success and looked like they might carry the day, but the French left managed to hold together even as Dutch troops circled around behind their line as shown below (Note I didn't have enough Dutch troops, so I subbed in some Prussians - that's why the flag is Prussian!):
It took the Allies quite some time to scythe through the demoralized troops of the French left. Conversely, after some initial losses from shooting, the massive wave of French mounted slammed full force into the Hanoverians on the Allied right, who seemed they might hold, then blinked, then evaporated:
The French then careened into a line of British that had been brought up in case the Hanoverians did not hold. With the Brits stretched over the entire board, command control became quite strained. This was the point at which Gary masterfully threw his Swiss in in the center to add further to my difficulties. A few valiant and glorious attempts to turn the situation (including a glamorous counter charge by some British dragoons that routed their French opponents, chased them back to French lines and attacked a battery of limbered, redeploying guns before finally being cut down) brought the French to a half a hair's breadth from breaking before the Allies finally broke and the game was over.
Final result: French 9-3 victory. The score doesn't really show that the French were significantly bloodied, too. In fact, two combats in the last bound both went to the French. If either of them had gone to the Allies it would have been a 9-4 victory for the Allies.
However, none of this is meant to diminsh the laurels that Gary rightfully deserves for a well executed battle plan that gave him control of the game and eventually the victory. Well played, friend!

Wednesday, May 2, 2007

Portuguese Dragoons

Here's a picture of my Portuguese dragoons. I really like how the Peninsular British army is turning out. So many different uniforms: Brits, Portuguese, Spanish and even a few Germans.

Thursday, April 26, 2007

SYW Russia Vs. SYW Austrian

It's not a bad thing when you have too many players wanting to play Make Ready! locally. Keith was busy running a couple of games at his place and I was sent to the book store, J&B's in Trenton, to educate Josh in the ways of the Russian army.

So here is how things ended up deployed:
Russia won the aggression roll and opted to place an unfordable river. Josh got a BUA and a couple of woods
in his central sector with a very handy woods up front. I screened this wood with my Con Msk(O) troops while he filled it with his lights troops and I went heavy on both sides of the woods with my Irr Msk(O) to the left and both of my commands with horse on the flanks. Josh's strong horse command was on the left but he had basically 2 commands behined, in and to the right of the woods and this initially worried me as this was my weaker side.

Bound 1:

At the end of bound one the game was shaping up. Josh was going to go at the Russians with his horse. My PIPs were great so I easily got my CR(I) and LH(S) into position on the right side and flanked his left side with my horse as he was going straight up at the Irr Msk(O) which I strung out into a single line to meet him.

Here is the fight on the Left starting to take shape and getting to the point of no return for Josh:

Josh opted to bring in his heavy horse in dribs and drabs which just got the @$%& shot out of it and what did make it into contact was out matched. Unfortunatly for Josh this is not an uncommon reaction for anyone when facing the Russian army for the first time ... it's the deer in the head lights syndrome. Russian's are every where! What do you do? He is worried about my flanking horse and grens advancing up. PIPs could have been better for him and rather then putting in a mass charge he's on the defensive which is breaking up his strong horse.

Back over on the right:

Josh got his LH on the gun and Grens but his other LH is in some serious horse trouble. Again too little of a commitment if the plan is to fight Russia frontally. You can't win in attrition against Russia, the army is big with higher shake and break points. Once again the dice were not kind to Josh. Except for the lone LH. double over laps and he wins the fight sending me off running from him! It took me 3 attempts at swarming this horse before it died!

The end is near on the left:

With the initial horse attack crushed Josh's left side is now shaken, out gunned and flanked. The Russian horse now go in after threatening for so long to mop it up.

Back on the right:


Josh finally pushes on the right side with his grens but he is still hesitant with his Muskets since they are (I) so he hangs back a bit looking to get my Cr(O) in front of my lines. I'm not sure if his lights should be leaving the woods because with his left side broken they are some easy pickings out of the woods. Josh did manage to silence my gun on this side. Those grens are on the wrong target ... get one on that gun! Where are the PIPs when you need them.

End of game:


Looking from the left you can see the Russian horse eating up the broken command here. I've limbered up my howitzers to move them to the right but it's not required as I've destroyed enough troops from the other 2 commands to break his army. The losses for the Russian's today ... 3 stands. PIP's were great for Russia today and the combat dice were fair as well.

Josh could have used a bit more luck ... especially with his PIP dice. Otherwise for his 5th game or so he is catching on fast. The game was quicked paced which makes it a lot of fun and once he figures out the strengths and weaknesses of the troop types he will be a force to be dealt with!

So I hope you enjoyed this recap of our game. I expect my next encounter with Josh to be a bit tougher and I look forward to it.

Cheers, Gary

Wednesday, April 25, 2007

Snow to go?

Static grass, flock, tea leaves and your wife's 7 herbs and spices ... people put everything on a base.
For my Russians I like a little snow. How do you get a nice snow effect easy ... raid the kitchen again for some baking soda or powder and you are all set.

I've added a new download of a great article I found a couple of years back on the method of snow that I use:

http://www.mediamax.com/makeready/Hosted/snow.pdf

The only thing that I don't use in this magic formula is the texture medium ... you get lots of texture ... trust me. I make it fairly liquid as it can be hard to work with if it's too pasty. and really watch the amount of blue you add or the effect seems fake. With a little practise you get some of the best snow you will ever see.

Gary

Friday, April 20, 2007

Games on April 19th

Wow! My house was really active last night as we had three Make Ready! games going on simultaneously. On table one, Gary Gilesovsky with his SYW Russians gave Joe Maynard's ACW Union army its initiation.

On table two I took my ACW Union troops against Mark's (seemingly) unstoppable SYW Prussians. My army is not completely painted yet, so if you see blank bases on the table, they were stand-ins for guys who are still on my painting table. I also haven't flocked the stands up or made them look nice. Future posts should be prettier and then I'll have the confidence to do some close-ups, too!

The game started with the Union deploying across the table and then asking the question: "Where are the Prussians?". Mark opted to keep his options open and deployed only one division on table. as shown below:

The felt in the bottom left is a town with an open field beside it. The field has a stone wall, behind which the Prussians are coweri- - uh, deploying.

Not knowing where the Prussian might be marching off table, I decided on a blitz to crush the one division that I could see. Troops raced across the board, bringing their guns with them. Mark's jager companies tried to organize a fighting retreat, but were eventually overwhelmed by the Union light infantry and cut down. As my heavy infantry on the far flank moved toward the town, the Prussians trained their guns on them at which point the Union light infantry (placed center table) raced in and started firing on the guns' flanks as shown below:

Fritz's mounted division came on on his own table edge, center table and the Union light infantry (having left all the heavies back on the starting block) became a bit concerned. Thankfully, they had hauled their guns up with them and soon, the light infantry had faded back out of harms way and five batteries were trained on Frederick's horse! Ouch....

Meanwhile, another Prussian infantry division arrived on the Union's left flank. Thankfully, I had deployed some mounted infantry on the left flank, who fanned out and covered most of the flank. Also, the dice were exceedingly good to me and a brigade of mounted troopers hiding in the woods on my left were able to race out and fill in the gaps, dismount and completely seal off the area. I thought the best chance of victory was to smash this flank march before it could take root, so the heavy infantry who had been advancing on the town left faced and went to lend their support. They left Berdan's sharpshooters to delay the Prussian advance, who were overwhelmed by musket fire and fled, blocking the redeployment. Meanwhile, heavy fire from the light infantry in the center had forced the Prussian infantry back from their guns which were then shot up quite nicely, stormed and captured, all shown below:

The loss of their rifle companies, both their gun batteries and accumulated infantry losses from cannon fire was enough to break the will of the Prussian center command. And with their mounted charge on the Prussian left in tatters and countless horsemen dead, the whole army decided it was time to withdraw from the field. Union losses were minimal, 3 elements destroyed. 9-0 Union victory.

Meanwhile, on table three Josh's Austrians (left) and Emen's Allied army (right) fought a back and forth struggle that centered mostly on a hill on the Allied left flank.


Apparently, the Austrian heavy cavalry charged uphill against some Dutch infantry with a jager company on its far flank. Even up hill, a mounted vs jager fight usually turns out pretty badly for the jagers, but these guys proved the old adage: "It's better to be lucky than good" and consistently threw back one charge after another.
The Austrians did manage to break through the Dutch heavy infantry eventually, so this wing was in imminent danger of collapse at end game (as was the Austrian's center!) A nail biter with an indecisive ending....
Thanks to everyone for participating!
Keith


Monday, April 16, 2007

Peninsular British (Part 2)

Here of some more of the figures from my Peninsular British army. They are Old Glory 15mm with flag supplied by Warflag.com

Keith

A closer look at the SYW Russian army...

Of all the armies available to the Make Ready! player my weapon of choice is the Seven Year War Russians.

Now don't tell Keith this but I think the Russians are a power house in the system. (every time I beat him he re-writes the rules so the Russians get weaker ... so mums the word, right?)

So what makes a good army in Make Ready! ? A few things do ... manuverability, solid troop types and healthy command sizes. So just where do the Russians fit in here?

Okay ... so they aren't maneuverable ... at least on the surface with 3 Irregular non-dice sharing generals. They can't move around like those blasted Prussians can. If you are going to play a Russian list you have to compensate for maneuverability with a good starting deployment.

What about solid troop types and command sizes? Here again it's give and take. The common foot soldier - Irr Msk(O) - is not a maneuverable troop BUT he is one tough Russian. He is also very cheap at 6AP, so you get a lot of them. Place them on the board so they don't have to do anything more then move straight forward at the enemy and I promise you that you will break what ever command is facing it. Watch those flanks ... they don't turn to face very well since it cost an extra PIP to do anything except go straight ahead their full movement. Mind you bad things do happen. Fear the horse ... those Irregular troops are quick-killed across the line so a little strategy is required when facing horse. I typically deploy 2 or even 3 ranks deep which gives you a lot of punch when faced with troops but when horse appear make sure you save a PIP to split the front rank from the 2nd rank to get out of the death zone. This also makes for a nice catchers mitt if and when any horse break through.

Let have a look at a successful Russian deployment Vs. the SYW Allied army:


Here we are in the flooded Dutch land ... a water way on the right with a small town and a number of marshes. The dutch are defending and have deployed back in line. They have regular troop types so the army is smaller and they have two dice sharing generals and one non-dice sharing general so they should be a bit better equipped to push an attack between the two dice sharing generals. The big problem with the Allies deployment is the central swamp. They have deployed a large number of troops behind it. Heavy troops cannot move through a swamp in any other formation then a column and at reduced speeds. Everything behind the swamp is basically out of the action and as he tries to get it into the action it will congest onto the other commands ... a big PIP issue to sort out.

The Russians have set-up with 2 commands with allot of horse on the left of the swamp. These commands are facing basically only 1 of the allied commands. This is a huge advantage being able to bring to bear the combined fire power of 2 onto 1 command. On the right of the swamp is my big Irr Msk(O) block and howitzers with a couple of light troops in the swamp. The Allied command to it's front is much smaller but it got allot of tough (S) troop types in it on the flank. A bit of howitzer fun should soften these tough guys out before they hit.

So lets see what happened:

As you can see the Russians took advantage of the far left flank with a mass horse charge.
The last horse at the bottom of the photo had just destroyed a Jagger stand and the question arose ... "where does the horse go"? Horse once they win a combat in Make Ready! are impetuous. They will move forward only 1 base depth if they are in a position to supply support but if they are not they have to charge through their full movement distance towards enemy if it is immediately to it's front. That Jagger is not to it's immediate front so it charges forward and stops at the swamp.
So the Allied flank command is doomed to be rolled up. Even if the horse charge went bad for Russia they have enough foot elements in the command to lose all the horse without breaking the command.

Back on the right:


Those pesky Allied Reg Msk(S) troops on the flank really started to worry me as the Allied general used those shared dice to push them hard up the flank. The Russian PIPs were good so I was able to spend allot of PIPs to get my muskets fanned out to stop his flanking maneuver and turn my howitzers to say hi. Gradings don't count for cannon fire and once he pushed into canister range this command crumbled when the big musket block hit his troops.

Once again minimal losses for the Russians 6 to 8 stands between 3 command. It's warm potatoes and Vodka for the boys tonight!

Saturday, April 14, 2007

Four more practice games today!

The first was Mark Beaudon playing SYW Prussian (left) vs Josh Garrett playing SYW Austrians (right):
Several steep hills cut the landscape, covered with rock and brush. A single gentle hill was placed center-left for the Prussians who quickly scooped it up and set up a massed battery on top of it. Josh attacked across the line, starting on the Prussian left (view flipped):

Josh hasn't finished painting all his Croats yet, so I substituted some of my Iroquois from my French and Indian War stash (Well, they ARE both Irregular skirmishing tribal infantry....)
This attack faltered and a second (ultimately unsuccessful) assault was tried against the Prussian right:
The game finally ended when the Austrians in a last effort charged uphill in the center into the massed Prussian guns supported by two brigades of infantry. I've deleted that picture. It wasn't pretty. Prussians 9; Austrians 0.
On the other table, Gary Giles took his SYW Russians against Emen Curtis's SYW Allies while Erik Hildebrandt looked on (obviously enraptured):

Emen tried to zip a brigade of elite troops led by the Hanoverian guards, around the the Russian right flank:

But the Russians managed to seal off the area and the Allies ended up having to take them on frontally. Meanwhile, a brigade of Russian cavalry pounced on the Allied right flank when it left the cover of a marsh:
Russians 9; Allies 0
After those two games were done, a third was played with Mark taking his Prussians against Emen's allies. The Prussians deployed entirely to one side of a huge marsh:
Emen tried to scurry his troops on the right into the fight, making a beeline through the marsh, but they didn't get into the fight before Mark moved in hard on Emen's left, including troops that had marched off table onto the
Allies extreme left (Most of the troops to the left of the little marsh in this picture are Prussians!) Time ran out on this game with the Prussians having routed only the division on the Allied left. Prussians 3; Allies 0.
Josh and I played a SYW Austrian vs Peninsular British match, but most of the troops were stand ins (like my Iroqouis) so I haven't included any pictures of that game.
Overall, quite a fun day!
Keith